Showing posts with label treat box. Show all posts

New Sweet & Spooky Kit


The Sweet & Spooky Kit ($29) includes everything you need to create cute and playful treat boxes that will make your Halloween gifting extra special.

You'll get all the supplies needed to make 15 treat boxes, 5 each of 3 designs. The printed designs and precut elements feature cute ghosts, bats, pumpkins and more, with iridescent foiled accents adding to the spooky colour palette. Your treat boxes come with coordinating tags and twine, so you will have your Halloween treats wrapped up in no time. Coordinating Stampin' Up! colours are Basic Black, Bubble Bath, Fresh Freesia, and Pumpkin Pie.
 

Don't forget you can check out the full range of kits that are available at any time in my online store.

Milk Carton Treat Boxes


I've been playing around in my studio lately trying to come up with this year's treat boxes for my craft fairs. Every year I sell out of these treat boxes as they make great gifts for teachers, bus drivers and coaches.  I design them so a gift card fits nicely into the box as well as some candy or chocolate.  I was trying to find a milk carton design for this year but couldn't find one that would work for me.  I felt a little like Goldilocks as 1 was too small, another was just a little too big but also required a 12 X 12 piece of cardstock, which cut into my color choices.  Turns out I was going to have to do some math and come up with my own size. HERE'S WHAT I CAME UP WITH!


Treat Box Instructions

   Here's what you'll need:                    


1.  On the long side of your cardstock score at 2 1/2, 5, 7 1/2, and 10 inches.
      Score short side at 2 1/2, 5 and 7 inches.

2. Trim as shown being careful to keep the 3/4" seam at the top of the cardstock.
     Cut along bottom score lines on 10 1/2 " side.


3.  Burnish all score lines. 

4.  Find mid point of 2nd and 4th 3/4" blocks and score down to 1st score line.  From that point on the score line score additional lines diagonally to 2nd score line, creating a scored triangle as shown.


5.  Use Tear & Tape or another adhesive to attach sides together to form box.


6.  Glue   4 DSP pieces to center blocks and the 2 smaller DSP to blocks without scored triangles.

7.  Fold in the 4 bottom panels and glue the bottom in place. (I glued all 4 panels to each other as I folded.

8.  Sit box on it's bottom and fold in the top of the carton pushing into the triangles to create milk carton shape.


9.  With top closed mark 2 spots for ribbon placement.  Create holes with Crop A Dial or other hole punch.


10.  Thread ribbon through holes and tie.

11.  Attach scalloped circles or other embellishments to finish box.  


Finished!  Don't forget the candy!


Treat Box Tutorial

January - Tutorial The matchbox-style box can be assembled without any adhesive. Decorate, add candy, and a sweet note. ‌ ‌ ‌ ‌ ‌ ‌ ‌ ‌ ‌ ‌ ‌ ‌ ‌ ‌ ‌ ‌ ‌ ‌ ‌ ‌ ‌ ‌ ‌ ‌ ‌ ‌ ‌ ‌ ‌ ‌ ‌ ‌ ‌ ‌ ‌ ‌ ‌ ‌ ‌ ‌ ‌ ‌ ‌ ‌ ‌ ‌ ‌ ‌ ‌ ‌ ‌ ‌ ‌ ‌ ‌ ‌ ‌ ‌ ‌ ‌ ‌ ‌ ‌ ‌ ‌ ‌ ‌ ‌ ‌ ‌ ‌ ‌ ‌ ‌ ‌ ‌ ‌ ‌ ‌ ‌ ‌ ‌ ‌ ‌ ‌ ‌ ‌ ‌ ‌ ‌ ‌ ‌ ‌ ‌ ‌ ‌ ‌ ‌ ‌ ‌ ‌ ‌ ‌ ‌ ‌ ‌ ‌ ‌ ‌ ‌ ‌ ‌ ‌ ‌ ‌ ‌ ‌ ‌ ‌ ‌ ‌ ‌ ‌ ‌ ‌ ‌ ‌ ‌ ‌ ‌ ‌ ‌ ‌ ‌ ‌ ‌ ‌ ‌ ‌ ‌ ‌ ‌ ‌ ‌ ‌ ‌ ‌ ‌ ‌ ‌ ‌ ‌ ‌ ‌ ‌ ‌ ‌ ‌ ‌ ‌ ‌ ‌ ‌ ‌ ‌ ‌ ‌
Love You Always Suite Tutorial - Helen Piaskowski


Now that the new January-June Mini Catalogue and Sale-a-Bration have arrived, it really does feel like a joyful New Year! I am so looking forward to more creative time and the chance to connect with my friends, even if life isn't quite normal yet. I truly feel that any way we can share time together is better than missing the opportunity.

Speaking of opportunity, have you had the opportunity to check out the awesomeness that is the new January-June Mini Catalogue? There are so many new things that I'm excited about that I just can't choose where to start.  New products, project inspiration, and ideas I'm looking forward to sharing with you!

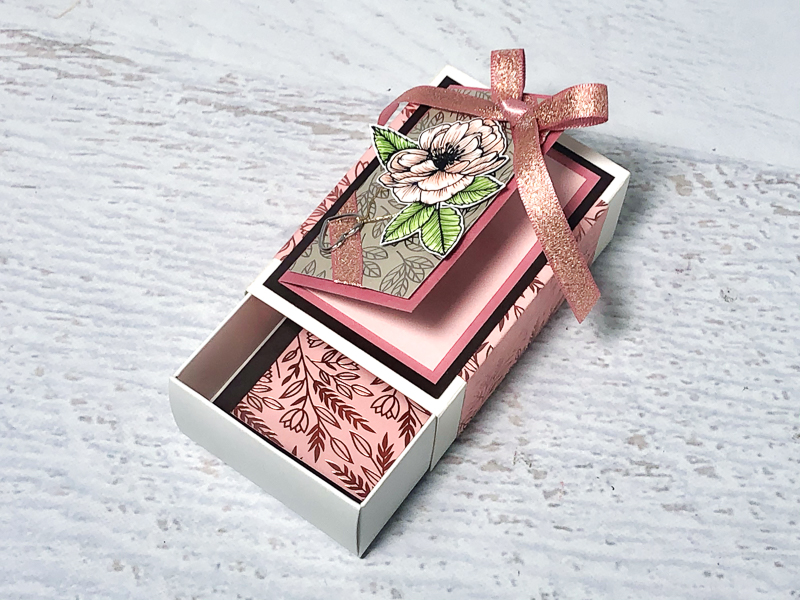
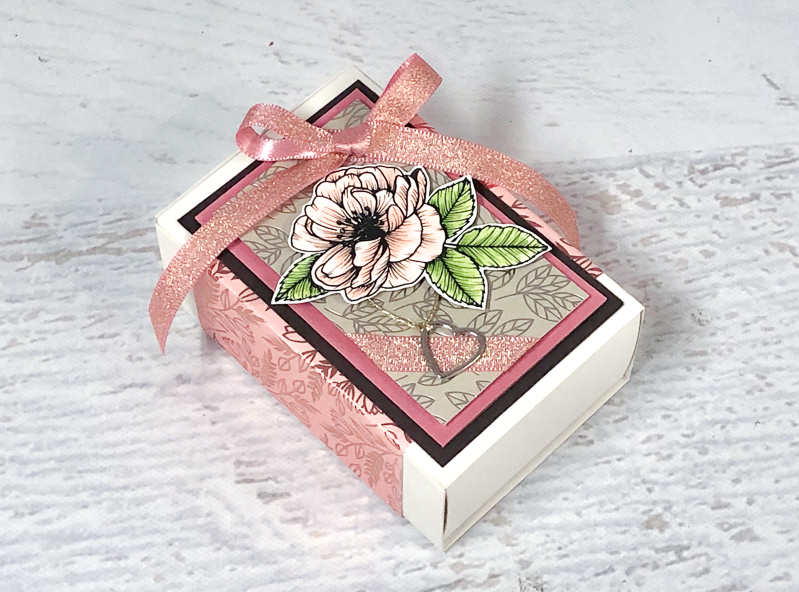
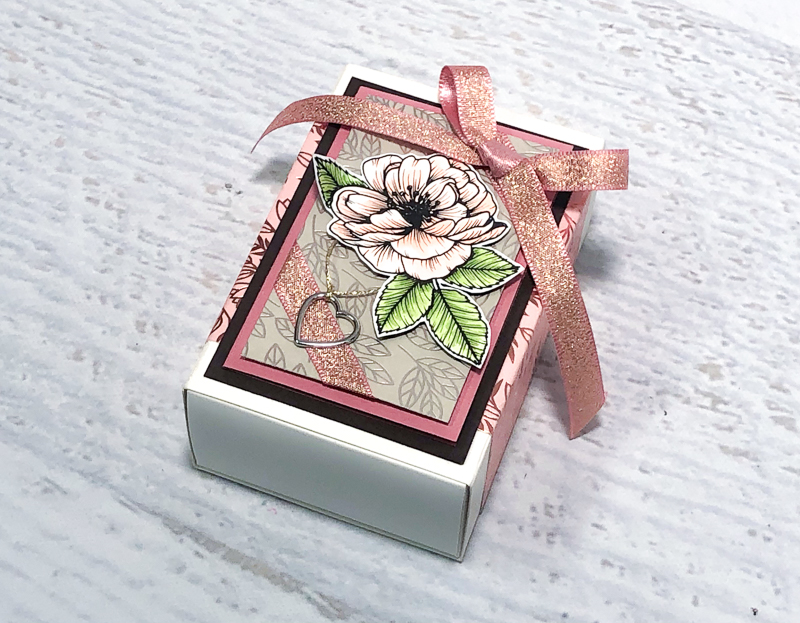
This month's tutorial features the gorgeous Love You Always Suite. I think you'll love this treat box and mini card combo that you can use to give a treat to your sweetheart and other loved ones!


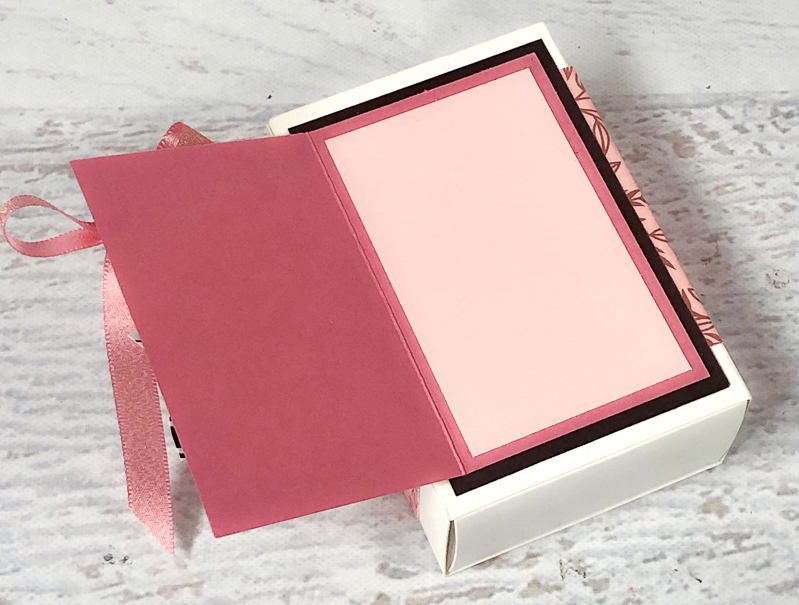
Treat Box with Mini Card Top

Project Inspiration
Project Inspiration
Project Inspiration

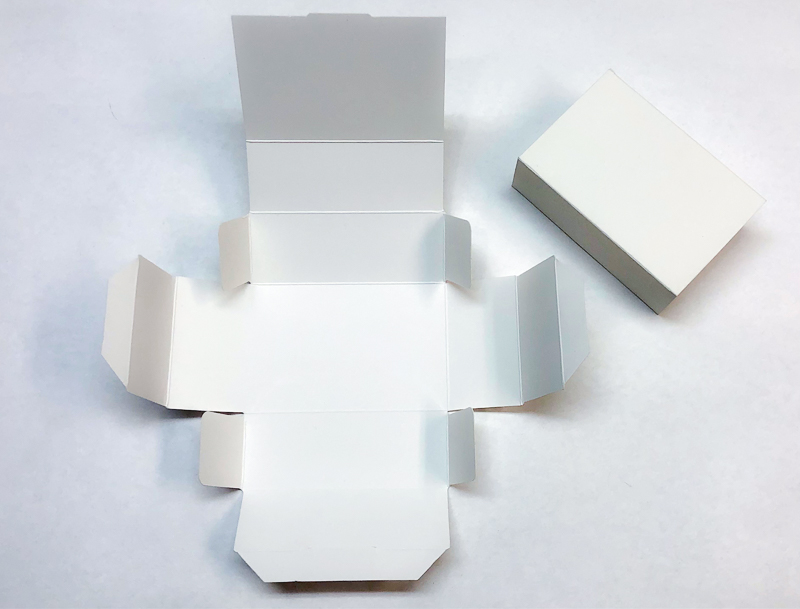
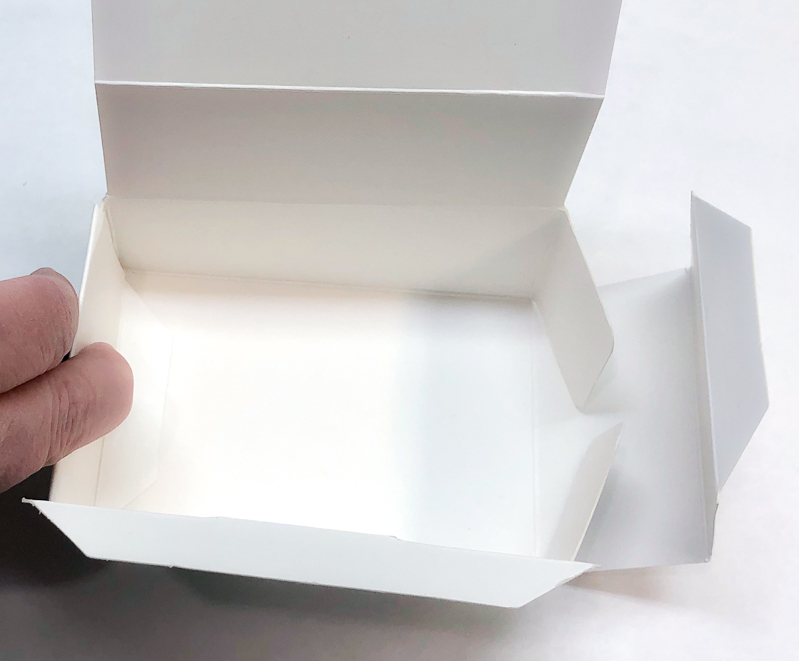
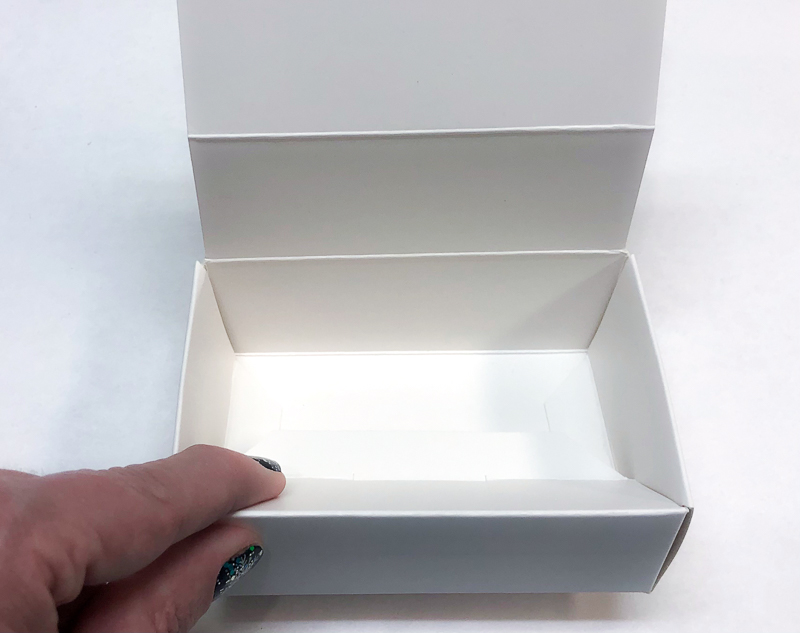
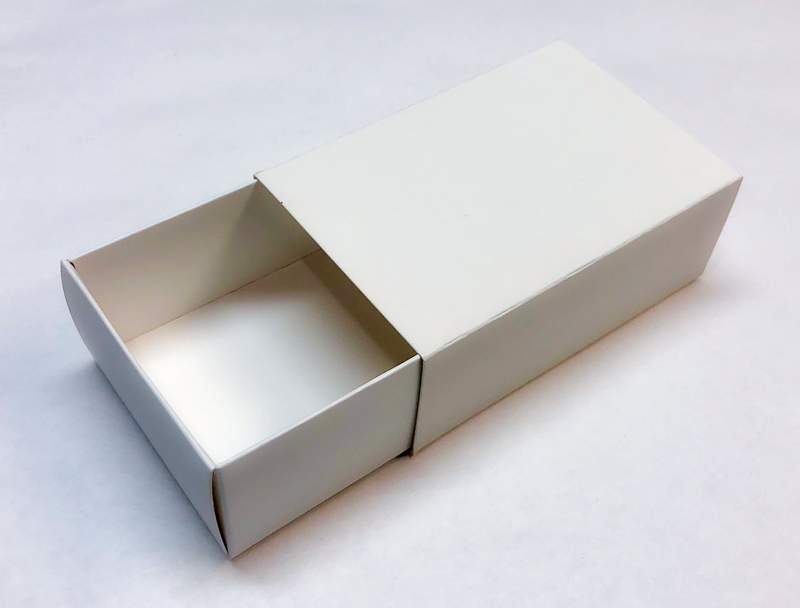
The matchbox-style box can be assembled without any adhesive and comes in two pieces, the box and the sleeve. The sleeve is fully assembled just pop the flat-folded piece open.

  1. Fold the box on all scored lines.
  2. Fold the small tabs in and fold the side flaps over the tabs. The small end section flattens at the bottom of the box.
  3. Fold the shorter front section over and press the small end section flat at the bottom of the box.
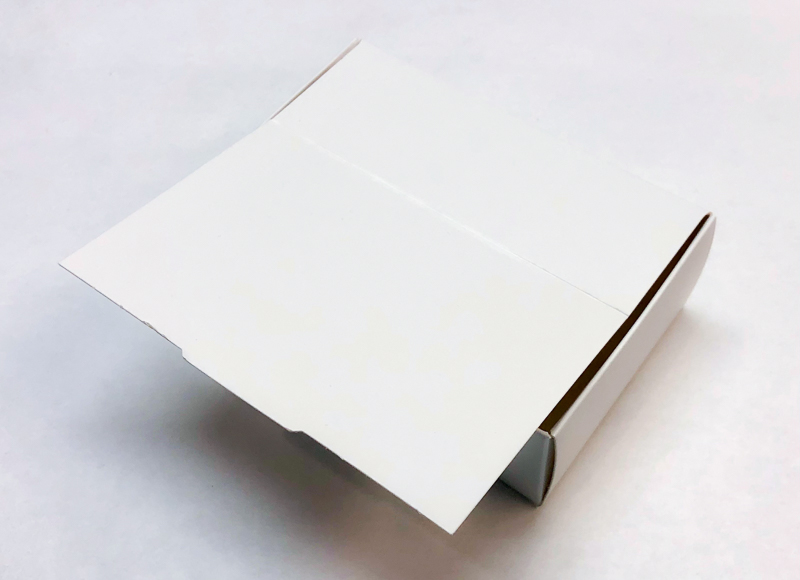
  4. Fold the long back flap over the box opening.
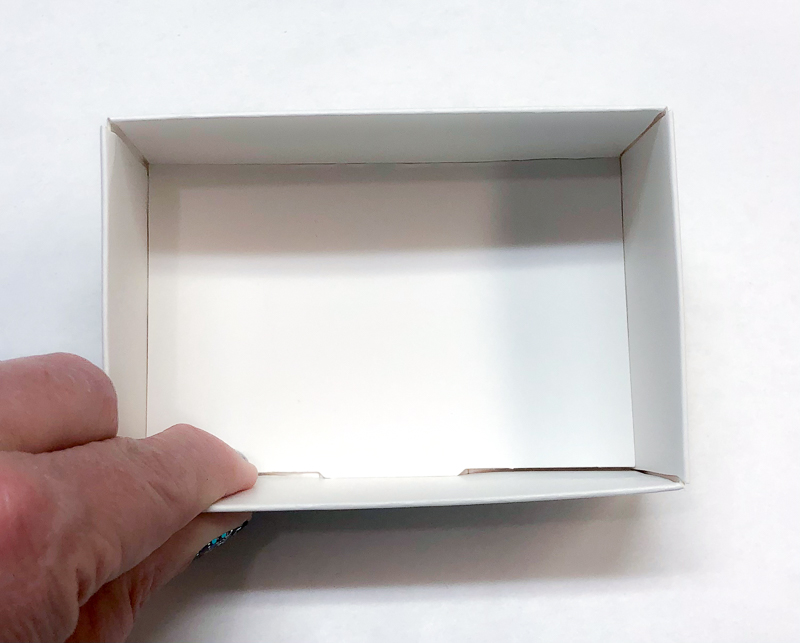
  5. Press down so the short section folds inside the box and the long section flattens onto the bottom of the box. The tab at the end slides into the slot in the bottom corner to hold the box securely.
  6. Slide the box into the sleeve like a drawer.
Project - Box Step 1
Project - Box Step 2
Project - Box Step 3
Project - Box Step 4
Project - Box Step 5
 Project - Box Step 6
Project - Step 1

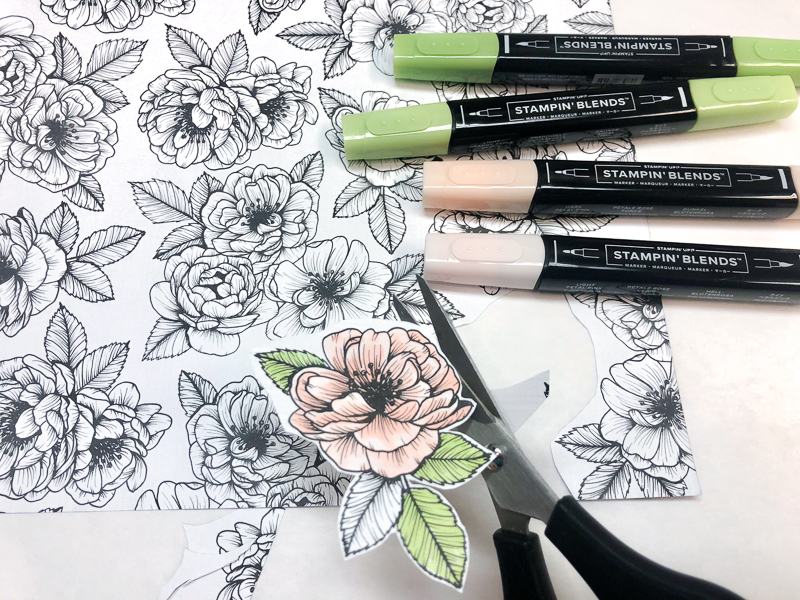
1. Cut & Colour True Love Paper

Colour a flower image from the True Love Designer Series Paper with Petal Pink and Granny Apple Green Stampin' Blends. Cut out with Paper Snips. Alternately stamp, die cut, and colour the flower images from the Forever & Always Bundle (#156200).
Project - Step 2

2. Cut & Layer Paper

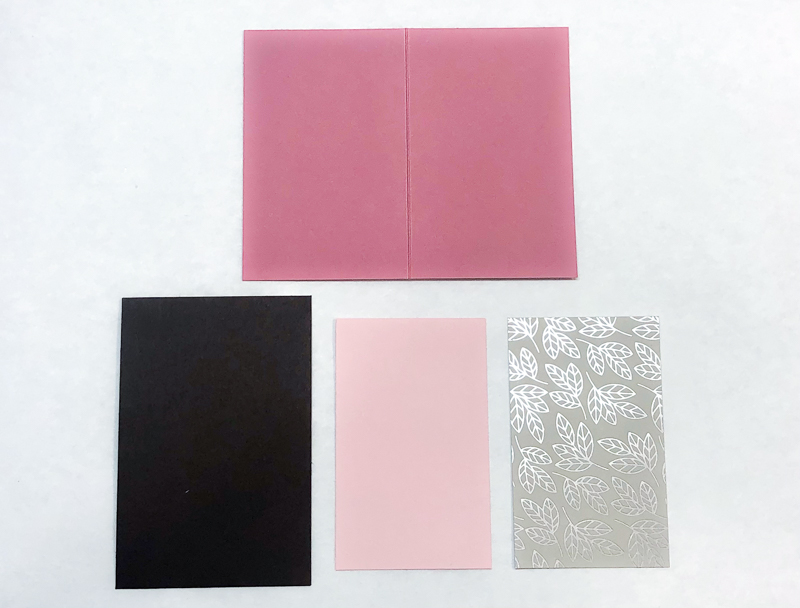
Score 4-1/2" x 3-1/2" Rococo Rose cardstock at 2-1/4" along the 4-1/2" side. Cut the following: Early Espresso cardstock 2-1/2" x 3-3/4", Petal Pink 2" x 3-1/4", Sahara Sand Love You Always Specialty Designer Series Paper 2" x 3-1/4". Fold the Rococo Rose mini card, adhere to Early Espresso layer. Adhere Petal Pink layer inside mini card.
Project - Step 3

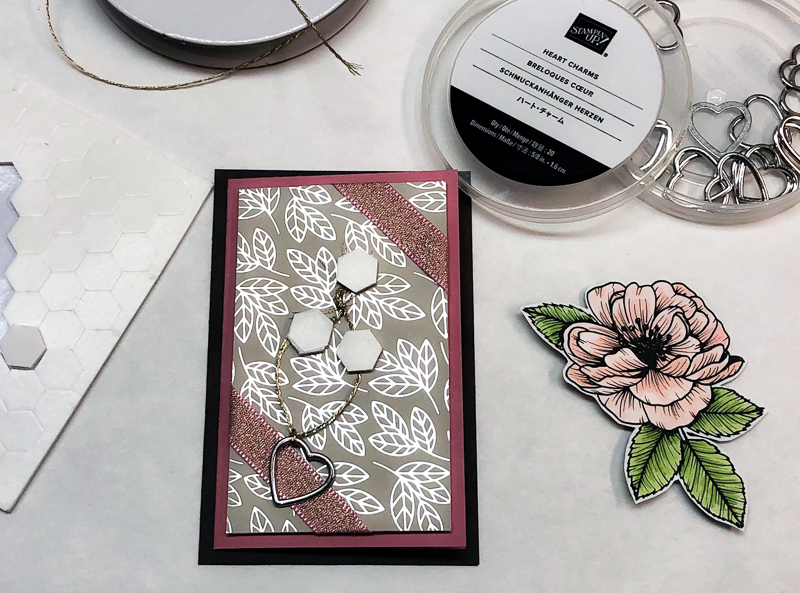
3. Add Ribbon & Heart Charm

Adhere 3" pieces of Blushing Bride 3/8" Metallic Ribbon paper. Adhere ribbon ends behind the paper with Stampin' SEAL. Adhere to card front with Stampin' Dimensionals. Thread charm onto 6" piece of Gold tread from Forever Greenery Trim Combo Pack (#152475). Knot the thread around the heart and create a loop. Adhere loop in place with Stampin' Dimensionals.
Project - Step 4

4. Cut & Fit Belly Band

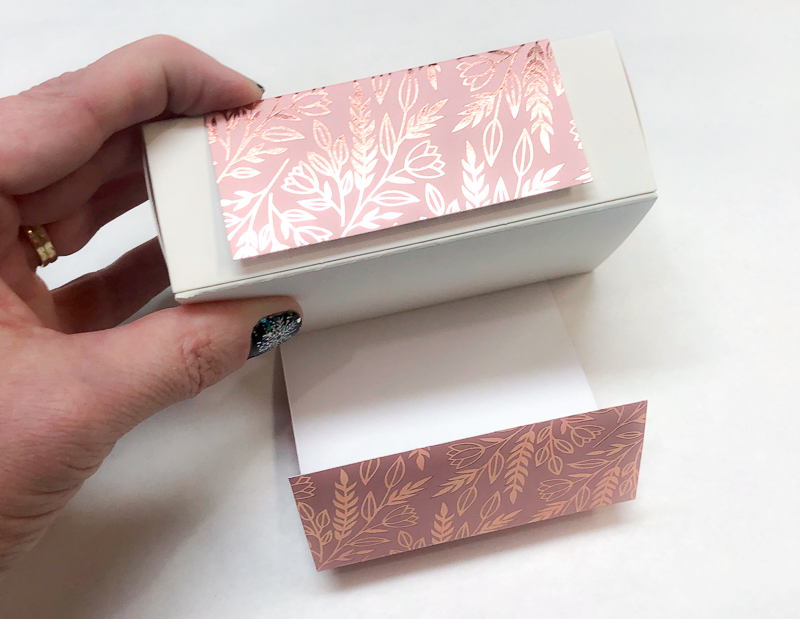
Cut Petal Pink Love You Always Specialty Designer Series Paper to 3" x 10". Save the 3" x 2" cut-off piece for later. Starting about 1/8" from the seem on the box sleeve, wrap the paper around the box. Use your fingers to create a bit of a crease at each corner.
Project - Step 5

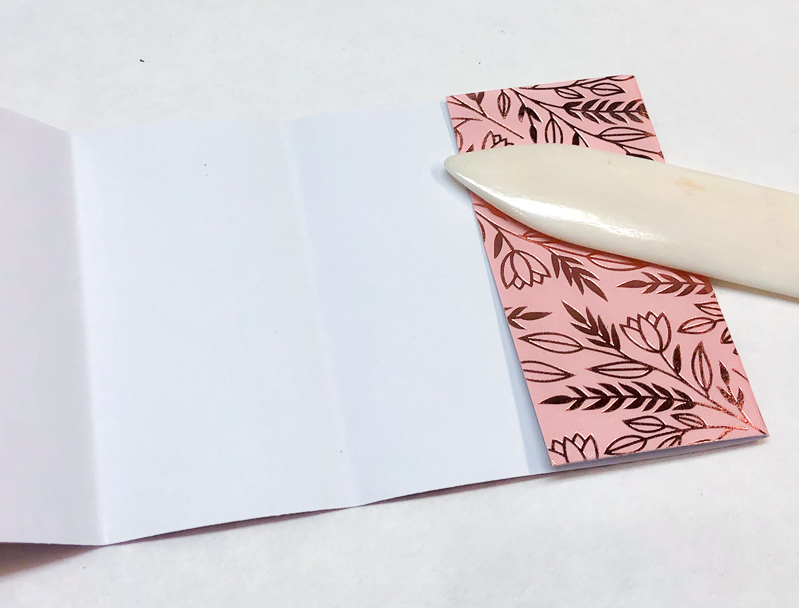
5. Crease Folds

Use a Bone Folder to crease each corner fold. Make sure the edges of the paper stay lined up as you crease the folds.
Project - Step 6

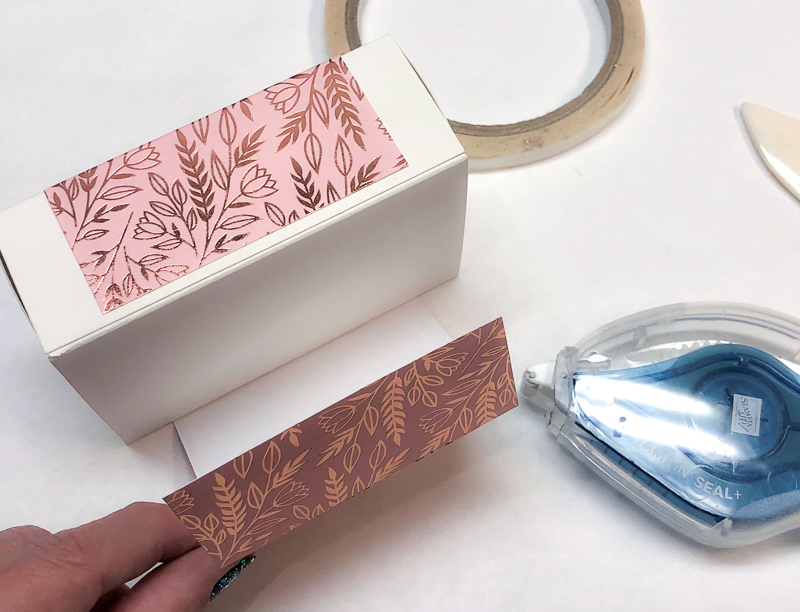
6. Add Belly Band

Use Tear & Tape or Stampin' SEAL+ to adhere Belly Band around the box starting with the shortest section near the seam of the box sleeve.
Project - Step 7

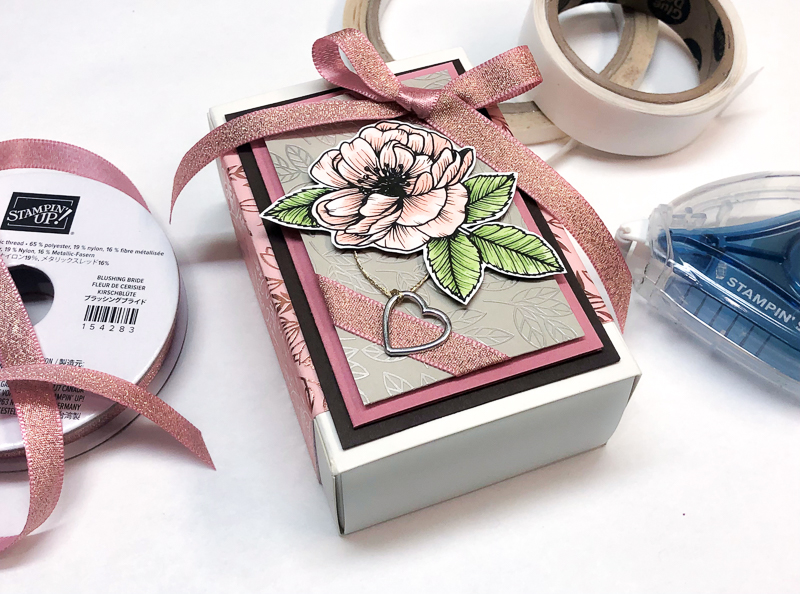
7. Add Card & Bow

Use Stampin' SEAL+ or Tear & Tape to adhere card centered on the top of the box. Add colored flower to the Stampin' Dimensionals on the card. Tie a bow with a 14" piece of ribbon and adhere to box with Glue Dots.
Project - Step 8

8. Finishing Touches

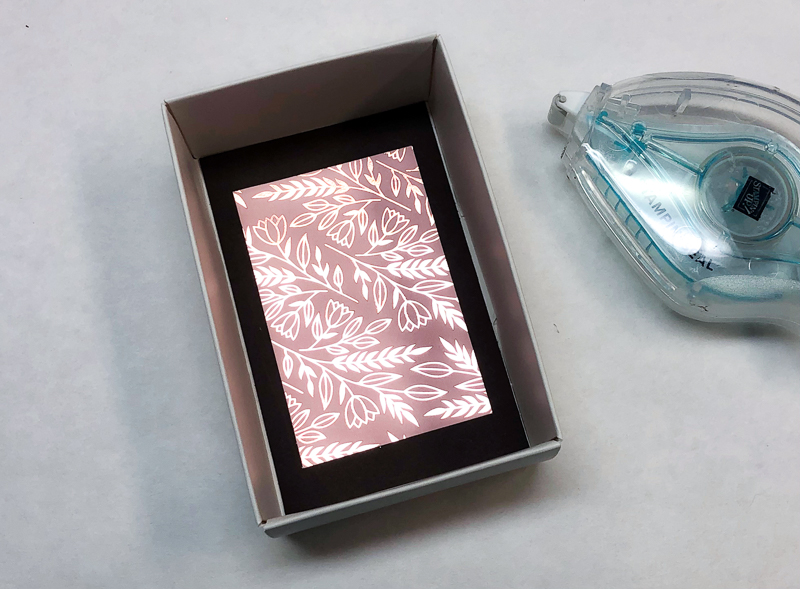
Adhere 3" x 2" Petal Pink Love You Always Specialty Designer Series cut-off piece to 2-1/2" x 3-7/8" Early Espresso cardstock. Adhere layers inside the bottom box for a fun finishing touch.
Project - Step 9

9. Add Sweets

Add candy, a sweet note, or small gift to the box and share the love!


Product List