October Color Inspiration

Colour Inspiration  ‌ ‌ ‌ ‌ ‌ ‌ ‌ ‌ ‌ ‌ ‌ ‌ ‌ ‌ ‌ ‌ ‌ ‌ ‌ ‌ ‌ ‌ ‌ ‌ ‌ ‌ ‌ ‌ ‌ ‌ ‌ ‌ ‌ ‌ ‌ ‌ ‌ ‌ ‌ ‌ ‌ ‌ ‌ ‌ ‌ ‌ ‌ ‌ ‌ ‌ ‌ ‌ ‌ ‌ ‌ ‌ ‌ ‌ ‌ ‌ ‌ ‌ ‌ ‌ ‌ ‌ ‌ ‌ ‌ ‌ ‌ ‌ ‌ ‌ ‌ ‌ ‌ ‌ ‌ ‌ ‌ ‌ ‌ ‌ ‌ ‌ ‌ ‌ ‌ ‌ ‌ ‌ ‌ ‌ ‌ ‌ ‌ ‌ ‌ ‌ ‌ ‌ ‌ ‌ ‌ ‌ ‌ ‌ ‌ ‌ ‌ ‌ ‌ ‌ ‌ ‌ ‌ ‌ ‌ ‌ ‌ ‌ ‌ ‌ ‌ ‌ ‌ ‌ ‌ ‌ ‌ ‌ ‌ ‌ ‌  ;‌ ‌ ‌ ‌ ‌ ‌ ‌ ‌ ‌ ‌ ‌ ‌ ‌ ‌ ‌ ‌ ‌ ‌ ‌ ‌ ‌ ‌ ‌ ‌ ‌ ‌ ‌ ‌ ‌ ‌ ‌ ‌ ‌ ‌ ‌ ‌ ‌ ‌ ‌ ‌ ‌ ‌ ‌ ‌ ‌ ‌ ‌ ‌ ‌ ‌ ‌ ‌ ‌ ‌ ‌ ‌ ‌ ‌ ‌ ‌ ‌ ‌ ‌ ‌ ‌ ‌ ‌ ‌ ‌
SNOWFLAKE SPLENDOR DESIGNER SERIES PAPER - Helen Piaskowski


The leaves are changing and bringing the lovely colors of fall to my neighborhood. I was pulling out my cozy blankets and thinking about how it will be winter before we know it!

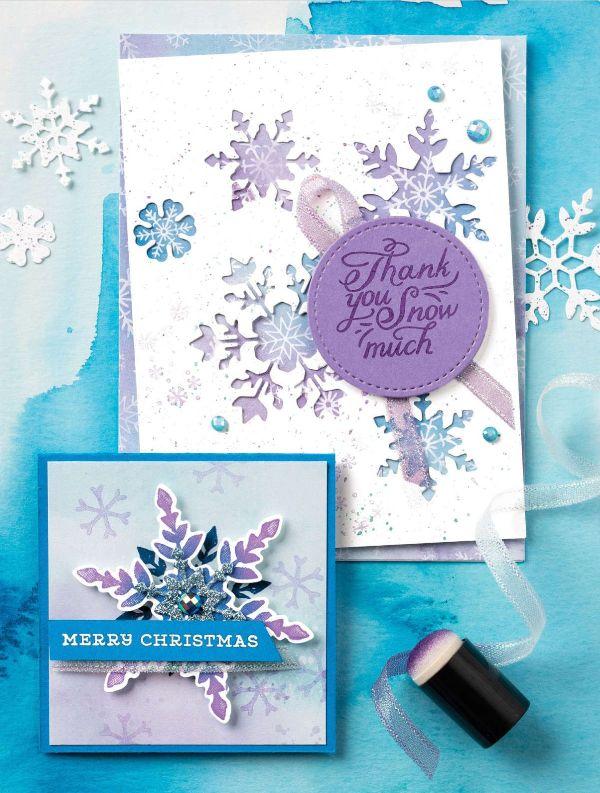
The Snowflake Splendor Suite is about as wintery as it gets, so it seems like the perfect muse for getting our Colour Inspiration ready for the changing seasons.

Don't forget to take advantage of the 15 Designer Series Papers that are on sale for 15% off! Sale ends October 31st - it would be spooky to miss such a good chance to fill your paper stash or get the perfect papers for your holiday and winter projects!


COLOUR INSPIRATION

Balmy
Blue
Highland Heather
Misty Moonlight

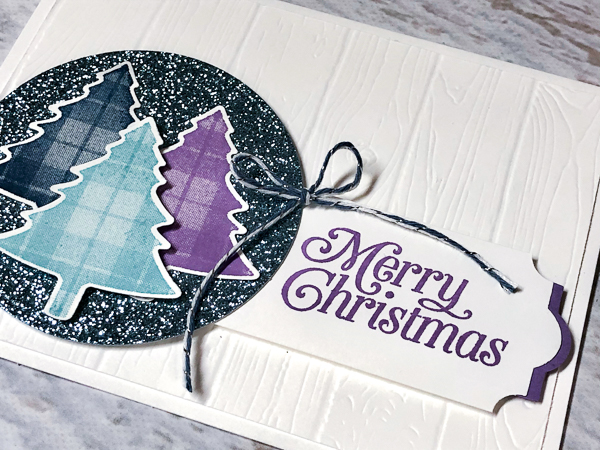
This month, blues and purples combine to create crisp, icy Color Inspiration, that is perfect for winter projects. Cool Balmy Blue, Highland Heather, and Misty Moonlight make a luscious combination with similar tones. The Balmy Blue Glimmer Paper adds the effect of icy crystals that finish this wintery combination.

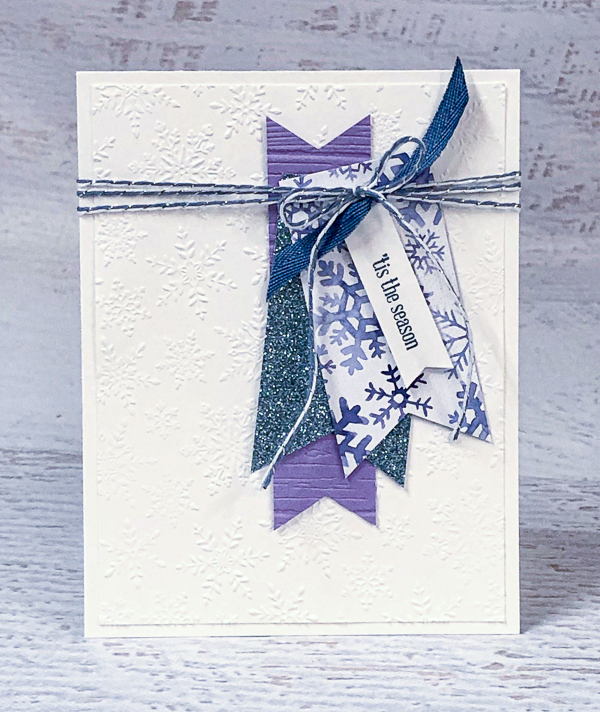
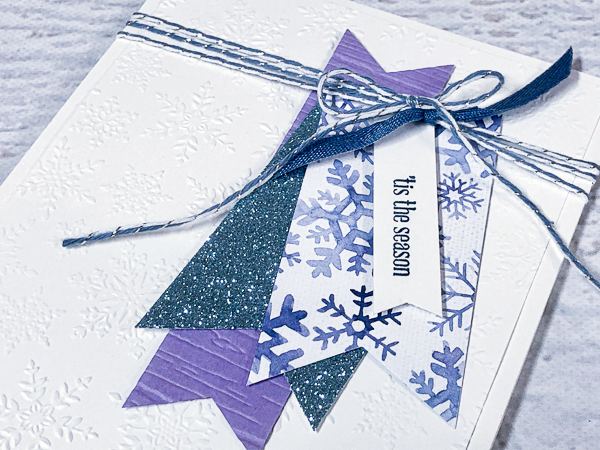
The first project features the Snowflake Splendor Suite, including the Snowflake Splendor Designer Series Paper (#153512), Winter Snow Embossing Folder (#153577), and Balmy Blue Glimmer Paper (#153513). Misty Moonlight 1/4" Ribbon (#153624) and Misty Moonlight and Silver Baker's Twine from the Flowers For Every Season Ribbon Combo Pack (#153620) add to the shabby chic style of this card.

This month's Colour Inspiration Project

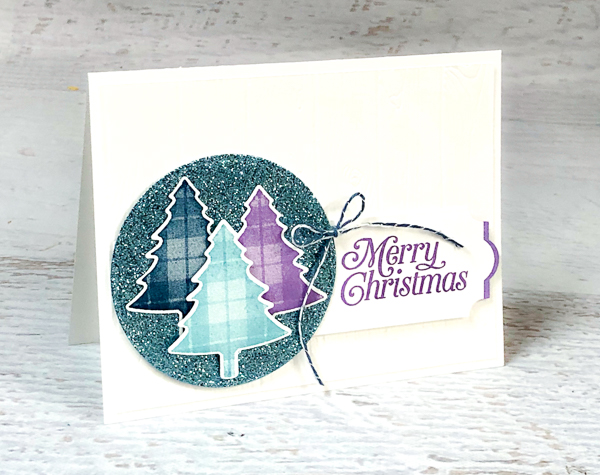
The second project features a modern twist on a traditional Christmas with fun plaid trees from the Perfectly Plaid stamp set (#149418) and it's coordinating Pine Tree Punch (#149521). The Pinewood Planks 3D Embossing Folder (#152320), Balmy Blue Glimmer Paper (#153513) and Misty Moonlight and Silver Baker's Twine from the Flowers For Every Season Ribbon Combo Pack (#153620) add the perfect finishing touches.

This month's Colour Inspiration Project


Product List

November Paper Pumpkin


Stampin' Up! Paper Pumpkin - Kits in the Mail

Paper Pumpkin - Paper Crafting Kits in the Mail

You are going to love the sweet surprises that show up in your mailbox this month! November’s cute Paper Pumpkin craft kit in the mail is gingerbread-themed. This kit is designed to make your gift giving that sweet homemade touch.

Gift cards are popular gifts to give and receive, but they could really use a bit of a personal touch. This month's Paper Pumpkin arrives just in time to help you share the joy and delight of a thoughtfully packaged gift.

This kit contains enough supplies to create 15 gift card carriers. Or use some or all of the supplies to make coordinating tags or cards to go along with your special gift card holders.

Don't miss your chance to create these sweet gift card holders and add the magic of handmade gifts to your holidays. Subscribe by November 10th!

VIEW SUBSCRIPTION OPTIONS
 ----------------------------------------------------------------------------------

Get Creative each Month
Your first kit comes with a FREE, clear stamping block. The box you receive each month contains all the materials you need to craft with ease, from adhesive to precut paper. All you need to do is follow the crafting instructions and assemble the pieces to create a Stampin' Up! card or project. Feel free to let your creativity flow and personalize your Paper Pumpkin craft!

Design
Finished gift cards are 2-1/4 x 4

Project Type
Kit contains enough supplies to create 15 gift card carriers and coordinating envelopes.

Coordinating Colors
Cinnamon Cider, Daffodil Delight, Calypso Coral, Mint Macaron, Shaded Spruce, Blushing Bride, and Whisper White


Sneak a Peek at the Jolly Gingerbread Paper Pumpkin Kit

Paper Pumpkin

WATCH VIDEO


VIEW SUBSCRIPTION OPTIONS

Subscribe to Paper Pumpkin before November 10th.

October Tutorial


OCT-Tutorial How to Make a Bunch of Cards Without Spending a lot of Time ‌ ‌ ‌ ‌ ‌ ‌ ‌ ‌ ‌ ‌ ‌ ‌ ‌ ‌ ‌ ‌ ‌ ‌ ‌ ‌ ‌ ‌ ‌ ‌ ‌ ‌ ‌ ‌ ‌ ‌ ‌ ‌ ‌ ‌ ‌ ‌ ‌ ‌ ‌ ‌ ‌ ‌ ‌ ‌ ‌ ‌ ‌ ‌ ‌ ‌ ‌ ‌ ‌ ‌ ‌ ‌ ‌ ‌ ‌ ‌ ‌ ‌ ‌ ‌ ‌ ‌ ‌ ‌ ‌ ‌ ‌ ‌ ‌ ‌ ‌ ‌ ‌ ‌ ‌ ‌ ‌ ‌ ‌ ‌ ‌ ‌ ‌ ‌ ‌ ‌ ‌ ‌ ‌ ‌ ‌ ‌ ‌ ‌ ‌ ‌ ‌ ‌ ‌ ‌ ‌ ‌ ‌ ‌ ‌ ‌ ‌ ‌ ‌ ‌ ‌ ‌ ‌ ‌ ‌ ‌ ‌ ‌ ‌ ‌ ‌ ‌ ‌ ‌ ‌ ‌ ‌ ‌ ‌ ‌ ‌& nbsp;‌ ‌ ‌ ‌ ‌ ‌ ‌ ‌ ‌ ‌ ‌ ‌ ‌ ‌ ‌ ‌ ‌ ‌ ‌ ‌ ‌ ‌ ‌ ‌ ‌ ‌ ‌ ‌ ‌ ‌ ‌ ‌ ‌ ‌ ‌ ‌ ‌ ‌ ‌ ‌ ‌ ‌ ‌ ‌ ‌ ‌ ‌ ‌ ‌ ‌ ‌ ‌ 
Tutorial - Helen Piaskowski

Hello Stampers;

With the start of the holiday season I've been thinking about what I love about each of the holidays. The things that tie them all together for me are the people and traditions. Now, more than ever, I'm wanting to connect with my friends and family. Even our silly little traditions mean a lot. I'm embracing the little things and wanting to share more joy.

One way I can do that, is to do more of what I love, making and sending cards. I hope you join me in sharing connection and joy with those you care about throughout the upcoming holidays!

This month's tutorial is perfect for making a bunch of cards without spending a lot of time, so it's a real win-win in my book. The Tag Buffet Project Kit is easy to dismiss as just tags, but I think you'll see it can be so much more!

Tag Buffet Tags Step-Up to Create Cards

Project Inspiration

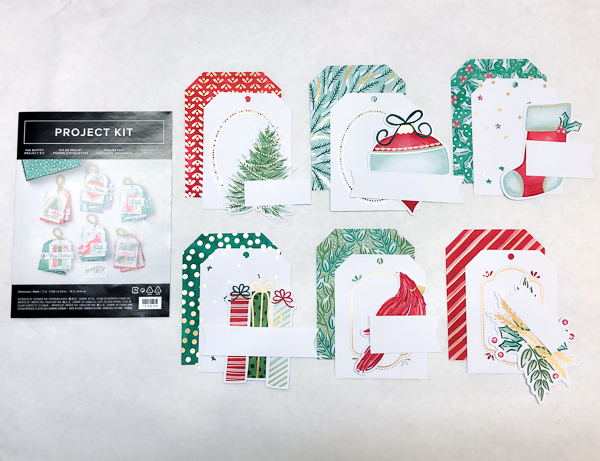
It's always fun to take something and re-purpose it to something else. The Tag Buffet Project Kit is ideal for this. This kit is an awesome value, it includes 30 tags, 5 each of 6 designs and a sturdy designer box for storing or gifting. These tags are big, detailed, and have gold foil accents, which makes them perfect for converting them into the focal point on cards.

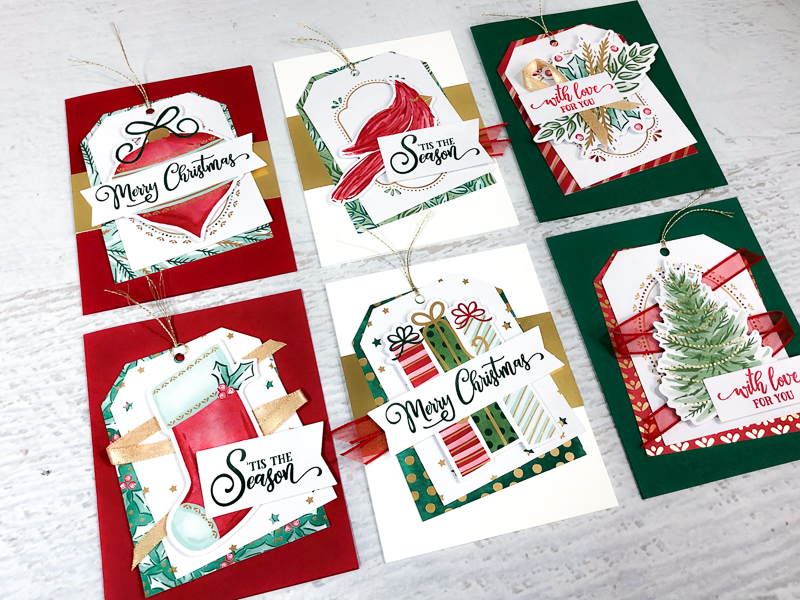
In this tutorial I'll share how to create a card for each of the 6 tag designs. You can mix and match tags and cards so that you give a gift with a coordinating tag and card, or you can make all 30 of the tags into cards, it's up to you!

SUPPLIES for 6 cards, one each of 6 designs:
Product List


Step-up Options: Step the the design even more with self-adhesive Wonderful Gems (#153536), stamp the card bases with images from the Tag Buffet stamp set, or emboss the card bases with the Winter Snow Embossing Folder (#153577)

Project - Step 1

1. Sort Tag Pieces

Sort out your Tag Buffet tag, image, and label pieces just like is shown in the instructions included with the kit. Supplies listed above are for 6 cards, if you want to make more just add up the supplies.
Project - Step 2

2. Cut & Score

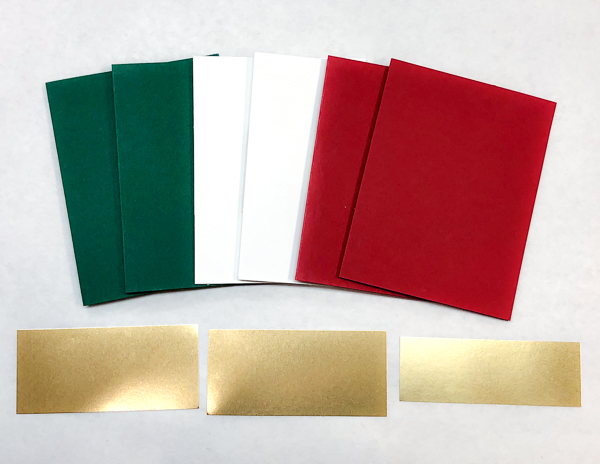
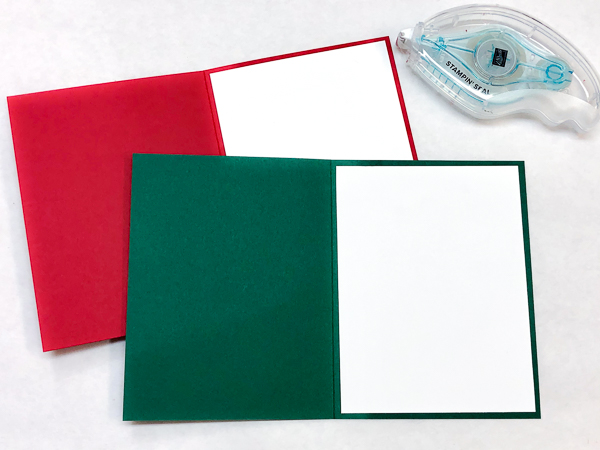
Cut two 5-1/2" x 8-1/2" card bases each from Real Red, Shaded Spruce, and Thick Whisper White cardstock. Score each at 4-1/4" along the 8-1/2" side. Cut Gold Foil Sheet to create two 2" x 4-1/4" pieces and one 1-1/2" x 4-1/4" piece.
Project - Step 3

3. Add Inside Layers

Cut four 4" x 5-1/5" pieces of Whisper White cardstock. Adhere one inside each Real Red and Shaded Spruce card as a writing area.
Project - Step 4

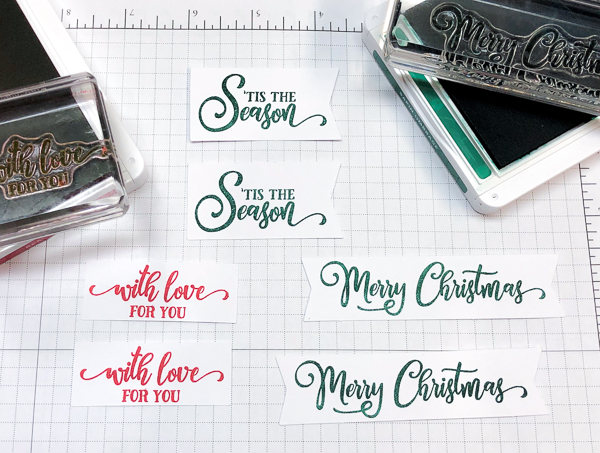
4. Stamp Greetings

Stamp greetings from the Tag Buffet stamp set onto the tag labels as shown using Real Red and Shaded Spruce ink.
Project - Step 5

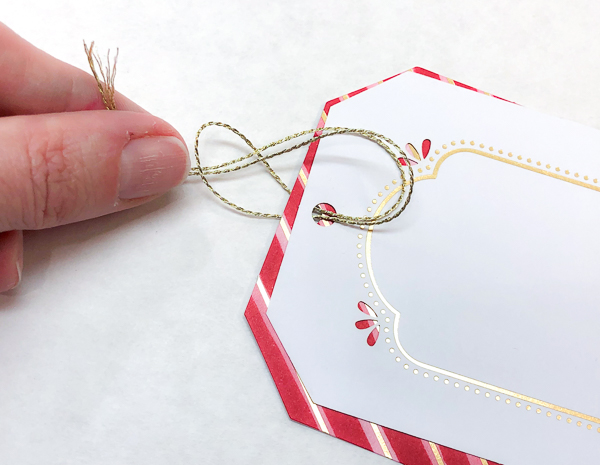
5. Add Gold Trim

Cut 6 pieces of Gold Trim to 8" each. Stack the 2 tag layers for each tag with the holes aligned. Fold trim in half and thread folded end through the holes. Thread the trim ends through the loop in the trim and pull snug.
Project - Step 6

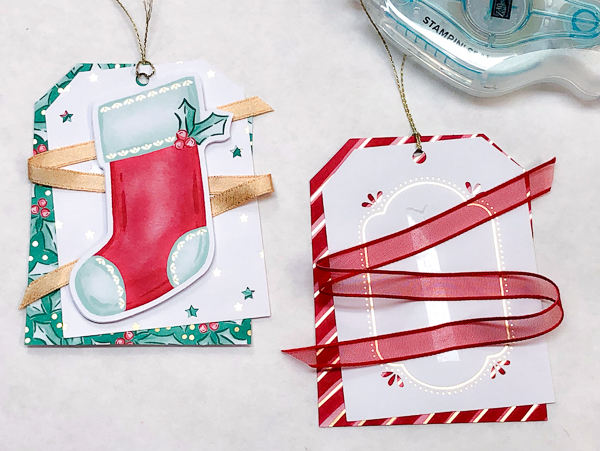
6. Add Ribbon Zig Zag

For the stocking and tree tags, cut 12" piece of the Gold Shimmer and Real Red Sheer ribbons. Add a stripe of Stampin' SEAL down the center of the white tag layer. Lay the ribbon across the tag in a zig zag starting at the top right and ending at the bottom left.
Project - Step 7

7. Shaded Spruce Cards

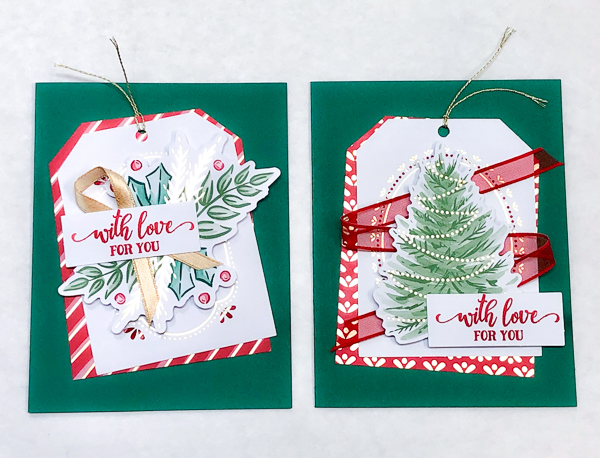
Gather the Shaded Spruce cards. Add the tags at an angle using Stampin' Seal. Add the greenery and tree images with Stampin' Dimensionals. Use 6" of Gold Shimmer ribbon to create a crossed ribbon. Adhere to card with Glue Dots. Add greetings to both cards.
Project - Step 8

8. Real Red Cards

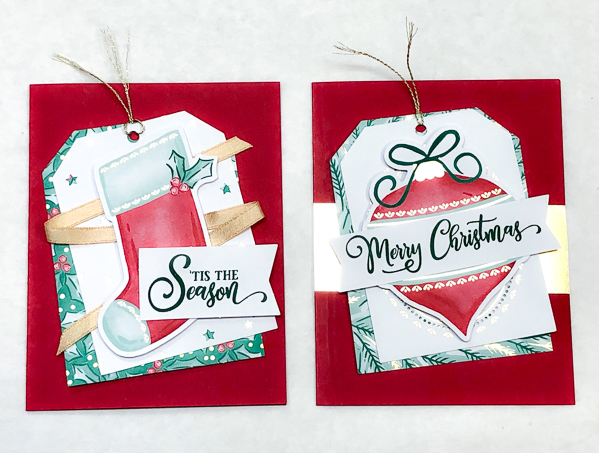
Gather the Real Red cards. Adhere the 1-1/2" x 4-1/4" Gold Foil strip across one. Add the tags at an angle using Stampin' Seal. Add the stocking over the ribbon zig zag and the ornament to the other with Stampin' Dimensionals. Add greetings to both cards.
Project - Step 9

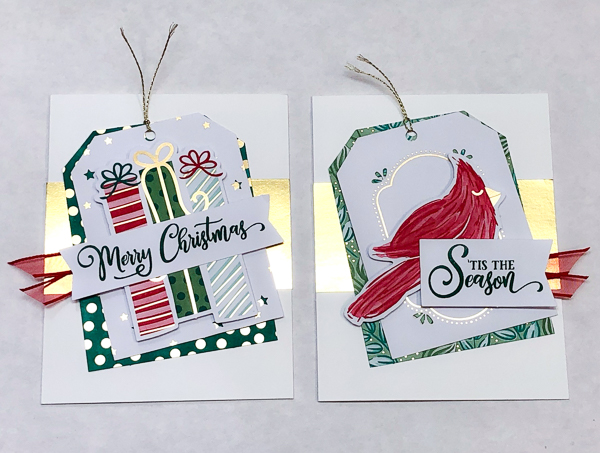
9. Whisper White Cards

Gather the Whisper White cards. Adhere a 2" x 4-1/4" Gold Foil strip across each one. Add the tags at an angle using Stampin' Seal. Add the cardinal and gifts with Stampin' Dimensionals. Cut two 4" pieces of Real Red Sheer ribbon. Fold in a "V" and adhere behind one of of each greeting label with Glue Dots. Add greetings to both cards.