Perfect Pair Sketch Inspiration


Here's this month's sketch:

And here's the project it inspired:

The Perfect Pairs Photopolymer Stamp Set features cute images of some of the best things that go together and is ideal for Valentine's cards.
 

The cookie image from the Perfect Pairs Photopolymer Stamp Set was stamped on Basic White Cardstock four times using Tuxedo Black Memento™ Ink. The images were each coloured with Stampin' Blends (Light and Dark Pecan Pie and colour 100 from the Deep Combo Pack). The milk carton image was stamped on Basic White Cardstock twice using the same black ink. The straw was coloured using Real Red Stampin' Blends, and the edges of the cartons highlighted with Balmy Blue Stampin' Blends. The cow image was stamped in black ink on one of the cartons. Two additional cows were stamped on Basic White Cardstock using black ink. All the stamped elements were cut out using paper Snips.

A rectangle of Basic White Cardstock was embossed using the Forever Plaid 3D Embossing Folder and trimmed to size (3½" x 4¾"). The stamped elements were adhered directly to the embossed panel. The sentiment, from the same stamp set, was stamped on a Basic White Cardstock strip (¾" x 3½"). Both ends of a strip of Real Red Cardstock (½" x 4¼") were cut to form flags, and the strip adhered behind the stamped sentiment strip using Stampin' Dimensionals. The completed sentiment element was added to the bottom of the embossed layer.

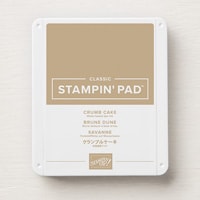
The finished panel was added to a Balmy Blue Cardstock mat, and then adhered to a Crumb Cake folded card base.
 

Shop my top product picks for this project:

New Cherry Blossom Treat Boxes Kit


The Cherry Blossom Treat Boxes Kit ($28) brings the delicate beauty of these iconic pink blossoms to easy-to-assemble favours perfect for weddings, baby showers, or birthdays.

You'll get all the supplies needed to make 12 treat boxes each measuring 2" x 2" x 2" (5.1 x 5.1 x 5.1 cm), with a slotted petal design that creates a beautiful and unique box closure. Add extra details to the preprinted tags using the additional die cut floral pieces and the exclusive Cherry Blossom Treat Boxes Photopolymer Stamp Set, then attach them to your boxes with Linen Thread. An Early Espresso Stampin' Spot is also included, and additional coordinating Stampin' Up! colours are Crumb Cake, Moody Mauve, and Pretty in Pink.
 

Don't forget you can check out the full range of kits that are available at any time in my online store. With everything you need packaged in a neat printed designer box, our all-inclusive kits are also great for gifting!

Winter Meadow Colour Combination


Creative Inspiration with a Colour Combination

Here's this month's colour combination:

And here's the project it inspired:

The Winter Meadow 12" x 12" Designer Series Paper may have been overlooked in the Annual Catalogue, and it features some patterns perfect for Christmas crafting.

A 3½" x 5" portion of the forest pattern sheet from the Winter Meadow DSP was cut into long strips measuring ½", ¾", 1" and 1¼" wide. These were then adhered to a 3¾" x 4¼" piece of Lost Lagoon Cardstock. Starting with the first and last strips helped ensure that the spacing between all the strips was even.

The sentiment, from the Christmas Labels Photopolymer Stamp Set, was stamped on Basic White Cardstock using Moody Mauve Classic Stampin' Ink. The sentiment was then die cut using the coordinating die from the Christmas Labels Dies and Stampin' Dimensionals added to the back. Black twine from the Baker's Twine Essentials Pack was threaded through the label die cut, wrapped around the Lost Lagoon square layer, and tied in a small bow to the left of the label. The label was then secured over the wrapped twine. The completed panel was added to a Pebbled Path folded card base.
 

Shop my top product picks for this project:

Don't forget you can bundle and save! Purchase the Christmas Labels Bundle and save 10%.

New Perpetual Beauty Calendar Kit


The Perpetual Beauty Calendar Kit ($34) allows you to create your perfect 12-month calendar.

You'll get all the supplies needed to decorate a calendar measuring 11½" x 7½" x 3/16". Stamp the months of the year using the included Perpetual Beauty Calendar Photopolymer Stamp set and Pretty Peacock Stampin' Spot. Use the precut paper pieces, stickers, and foiled die cut accents to finish embellish your pages and your calendar is ready to hang, use, and admire. Additional coordinating Stampin' Up! colours are Basic Black, Crumb Cake, Garden Green, Lost Lagoon, and Misty Moonlight.
 

Don't forget you can check out the full range of kits that are available at any time in my online store. With everything you need packaged in a neat printed designer box, our all-inclusive kits are also great for gifting!

FREE Shipping


For three days, starting on December 9th, Stampin' Up! is giving FREE SHIPPING on all orders of $100 or more. This is the perfect chance to restock your basic supplies like adhesives, cardstock, and envelopes ready for crafting in the New Year.

Don't forget that our Last Chance Products are available while supplies last, and you'll find many products that are discounted by 10-80%! Check out our Kits Collection and Online Exclusives too, as they, along with all of our catalogue items, are all eligible for this free shipping offer.

The busy Christmas season means that shipping may take longer than usual. Any orders placed during this promotion are not guaranteed to arrive by Christmas.

Visit my online store to place your order, and remember that this offer ends on December 11th!

New Designer Series Papers


Some familiar favorite patterned papers are back in fresh new colour combinations! Refreshed versions of three previously released Designer Series Papers featuring some of our best-selling colours are now available to purchase online.
 

Shades & Hues is recoloured from Color Theory, and features Fresh Freesia, Misty Moonlight, Petal Pink, and Pool Party:

Serene Love is recoloured from True Love, and features Lost Lagoon, Night of Navy, and Old Olive:

Refreshed Beauty is recoloured from Blackberry Beauty, and features Daffodil Delight, Flirty Flamingo, Granny Apple Green, Lemon Lime Twist, and Peach Pie:

View the three new papers in the Online Exclusives category of my online store. They are only available while supplies last, so order soon to avoid disappointment!

Last Chance Products


Last Chance Products

The new Last Chance product category is now available to browse in my online store. This new section of the store combines our previous Clearance Rack offering and the Last Chance promotions that came at the end of each catalogue. With this first update, you'll find products leaving our product range from the September-December Mini Catalogue, the September Scrapbooking Brochure, and some of our Online Exclusive releases. You'll also find products listed that were previously available on our Clearance Rack.

These Last Chance products are sold on a while supplies last basis with no set end date to their availability, and will be discontinued once they sell out. Some products are discounted so you'll still be able to get some great bargains!

Future updates to this product category will happen at the beginning of alternate months (February, April, June, August, October, and December), which will include products being added to the category and discounts adjusted. With more regular and frequent updates being made, it will be easier to gauge when products in our Online Exclusive range and Kits Collection are likely to be discontinued.

If something on your wish list is now a Last Chance product, please place your order as soon as you can to avoid disappointment as all Last Chance items are only available while supplies last! You can view all the Last Chance products available to purchase at any time in my online store.

Last Order Date for Christmas Delivery


As you may or may not know I had been away travelling for several weeks. I hit the road on the last week of September and returned mid-November. While the time away from home was both exciting ( as in dodging 2 hurricanes) and relaxing (playing a few rounds of golf in Myrtle Beach and Florida) it is nice to be home again.  But it also feels like Christmas is just around the corner and I haven't even finished my travel laundry yet!  I am also trying to catch up on your emails, phone messages and sending out your newsletters. Here's hoping your Christmas planning is going better than mine.

The Christmas season is a busy time of year for sending and receiving packages so shipping may take longer than normal in the coming weeks. Due to the current Canada Post labour strike, the carriers used (UPS and FedEX) are also currently dealing with higher service volumes which could result in extended delivery times. Please submit any online orders you wish to receive in time for Christmas by Wednesday, December 11th. Although Stampin' Up! cannot guarantee that these orders will arrive before Christmas, best efforts will be made to ship orders as quickly as possible.

Creative Inspiration with a Sketch


Here's this month's sketch:

And here's the project it inspired:

This cute card uses products from the very appropriately named Otterly Adorable Suite Collection, one of the many new products available as part of November's Online Exclusive product release.
 

A rectangle of the brown-grey swirled pattern from the Otterly Adorable 12" x 12" Designer Series Paper was adhered to an Early Espresso folded card base. A 3" x 4¼" rectangle of the seaweed fronds pattern (with the fronds running vertically) was layered onto a Basic White Cardstock mat (3⅛" x 4⅜"), and added to the card front at an angle.

The sentiment, from the Otterly Amazing Photopolymer Stamp Set, was stamped to the left side of a 1½" wide Basic White Cardstock strip using Gray Granite Classic Stampin' Ink. The two otters were cut from the DSP sheet using the coordinating dies from the Otterly Amazing Dies. The larger otter was adhered to the right-hand side of the sentiment strip using Stampin' Dimensionals, and the smaller otter added to the left of that using Multipurpose Liquid Glue. The completed sentiment strip was added to the bottom half of the card front using Stampin' Dimensionals and trimmed to fit.
 

Shop my top product picks for this project:

Don't forget you can bundle and save! Purchase the Otterly Amazing Bundle and save 10%.

Seasonal SALE Now On


It's time to save up to 20% in our Seasonal Sale!

Until November 15th, select products from the 2024-25 Annual Catalogue are on sale with the following discounts:

  • 10% off ink, including pads, refills, markers, and Stampin' Blends (excludes ink pad bundles and third-party ink pads)
  • 10% off cardstock (excludes CTMH™ cardstock)
  • additional 10% off all stamp & die and stamp & punch bundles
  • 20% off all Designer Series Paper

With basics such as ink and cardstock on sale, it's a great time to stock up. You always save 10% when you buy a stamp set and coordinating punch or die set as a bundle, but you'll save an extra 10% on top of that on bundles from the 2024-2025 Annual Catalogue during this sale. Our gorgeous Designer Series Papers are even more irresistible when you know you're saving 20%!

You're going to need to be quick if you don't want to miss out on these amazing savings. Don't forget that this sale lasts for just three days, and some items may sell out due to high demand during this limited time offer.

Click here to visit my online store and place your order.

Creative Inspiration with a Colour Combination


Here's this month's colour combination:

And here's the project it inspired:

The Reindeer Days Suite Collection includes classic Christmas colours and cute reindeer imagery, making it easy for you to create magical winter projects.

A 2" x 5" strip of the Real Red and Basic White patterned paper from the Reindeer Days 12" x 12" Designer Series Paper was layered on Real Red Cardstock, and adhered to the left-hand side of a folded Pool Party card base to form the background element.

The image of two reindeer from the Reindeer Fun Photopolymer Stamp Set was stamped on Basic White Cardstock using Tuxedo Black Memento™ Ink, and colour added using Crumb Cake, Pecan Pie, and Petal Pink Stampin' Blends. The coloured image was then cut out using the coordinating die from the Reindeer Fun Dies. The third smallest die from the Countryside Corners die was used to create a Basic White label shape for the reindeer image to be adhered to. The label element was then added to the card front using Stampin' Dimensionals.

The "Merry Christmas" sentiment, also from the Reindeer Fun Photopolymer Stamp Set, was stamped on a ½" x 3½" strip of Garden Green Cardstock using VersaMark™ Ink and embossed with White Embossing Powder (from the Basics WOW! Embossing Powder set). The right end of the strip was cut to a flag shape using Paper Snips, and the strip added to the card front using Stampin' Dimensionals.

The holly leaves and berries were die cut from Garden Green and Real Red Cardstock respectively, using the dies from the Reindeer Fun set. The edges of the holly leaves were inked using a Sponge Dauber and Garden Green Classic Stampin' Ink to add depth. The leaves were added to the card front using Stampin' Dimensionals and the berries adhered to the center of the leaves using Mini Glue Dots™. Iridescent Faceted Gems were added as the final embellishments.
 

Shop my top product picks for this project:

Don't forget you can bundle and save! Purchase the Reindeer Fun Bundle and save 10%.

The Reindeer Days DSP can also be bought together with a coordinating sticker sheet, which is part of our new range of scrapbooking products that also includes the Reindeer Memories Scrapbooking Workshop Kit and much, much more!

Creative Inspiration with a Sketch


Here's this month's sketch:

And here's the project it inspired:

The Yuletide Village Photopolymer Stamp Set makes it easy to create snowy village scenes, perfect to send festive greetings from your home.
 

A Basic White cardstock layer was embossed using the Snowflake Sky 3D Embossing Folder and trimmed to measure 3" x 4". This was adhered to a Lost Lagoon mat (measuring 3¼" x 4¼"). Pool Party ⅝" (1.6 cm) Pompom Ribbon was looped around the layers, and tied off to the left-hand side with a bow made using a length of Basic White Twine from the Baker's Twine Essentials Pack.

The wider single cottage image from the Yuletide Village Photopolymer Stamp Set was stamped using Basic Gray Classic Stampin' Ink on the upper right-hand side of a Basic White Cardstock stitched circle, cut using the largest circle die from the Stylish Shapes Dies. Colour was added to the cottage image using the light Stampin' Blend markers in Crumb Cake, Petal Pink, and Pool Party, with the Color Lifter used to help fill the soft colour in each area. The other single cottage image and separate tree image from the same set were also stamped on Basic White Cardstock, and coloured using the light Stampin' Blend markers in Crumb Cake, Pool Party, and Soft Sea Foam, with the Color Lifter to assist as well. These two stamped images were carefully cut out using Paper Snips, and added to the left-hand side of the stamped circle using Stampin' Dimensionals. The sentiment, from the Keeping Tabs Photopolymer Stamp Set, was stamped under the first cottage in Basic Gray. White Loose Snowflakes were added around the stamped elements as additional embellishments.

The stamped circle element was added to the embossed and layered cardstock rectangle using Stampin' Dimensionals, and the completed panel adhered to a folded Pool Party card base that had been stamped all over using the snow image from the Yuletide Village Set with Pool Party ink.
 

Shop my top product picks for this project:

Starter Kit Special


Sign up as a Stampin' Up!® demonstrator during October and you'll get an extra $41 of added value in your Starter Kit. For just $135, you'll get to choose $165 $206 worth of product. Your kit also includes FREE shipping, additional business supplies, plus all the fun that comes with being a part of my team and the Stampin' Up! creative community.

One of the many perks of being a demonstrator is that you get to preorder products before they become available to customers. As there are new products being added to our Online Exclusive range during November, it means demonstrators can order those new products during October and get them first! You can even add preorder items to your Starter Kit. You can also add items from our Kits Collection that are discounted during our October sale to your kit.

Sign up online, or get in touch if you have any questions.

3 Day Stamp Sale


For 3 days only, from October 7th - 9th, you'll save 15% on all Annual Catalogue stamp sets (photopolymer and cling). You aren't going to want to miss this once-a-year sale! Stamp sets are only available while supplies last. Bundles are not included in this sale.

New Christmas Ornaments Kit


The Christmas Ornaments Kit ($34) includes everything you need to make 9 beautiful Christmas ornaments, perfect to add to your festive decorations or to give as a gift.


Your kit comes with all you need to make nine 4" (10.2 cm) and 3" (7.6 cm) metal ring ornaments (3 each of 3 designs). Start building your ornaments using die cut printed paper pieces and gold metal rings, and then decorate with the included plastic pinecones and faux berries, pre-tied satin bows, and precut greenery. Finish each decoration with gold metallic string and they are ready to hang. Adhesive is included, but using hot glue may make assembly easier (glue gun not included). Coordinating Stampin' Up! colours are Basic Beige, Cherry Cobbler, Mossy Meadow, Old Olive, and Pretty Peacock.
 

Don't forget you can check out the full range of kits that are available at any time in my online store.

Creative Inspiration with a Sketch


Here's this month's sketch:

And here's the project it inspired:


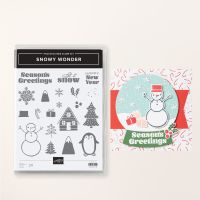
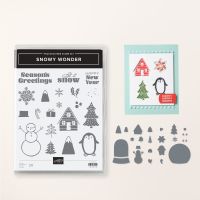
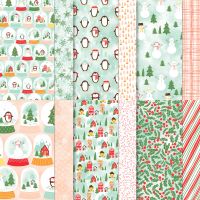
Create a fun and festive card with a pretty snow globe scene using products from the Snowy Scenes Suite Collection from the new September-December Mini Catalogue.
 

Three strips, each measuring 3¾" x 1½", were cut from the striped patterned paper from the Snowy Scenes 12" x 12" Designer Series Paper. These were adhered, spaced evenly, on a Pebbled Path folded card base.

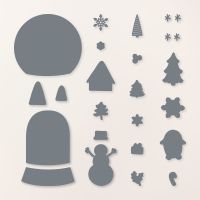
The house image from the Snowy Wonder Photopolymer Stamp Set was stamped on Basic White Cardstock using Pebbled Path Classic Stampin' Ink, and the spruce tree image stamped on Basic White using Shaded Spruce ink. Both were die cut using dies from the coordinating Snowy Wonder Dies. An additional small tree was die cut from Granny Apple Green Cardstock. The snow globe dome was cut from Basic White Cardstock using the circular dome die from the same die set. The die cut trees were adhered directly to the white dome die cut, and the house element added using Stampin' Dimensionals™. The snowflake images, again from the Snowy Wonder set, were stamped using Pool Party ink to fill in some of the white space.

The snow globe base was cut from Crumb Cake Cardstock using the die from the same Snowy Wonder Dies. The "Let it Snow" image, again from the Snowy Wonder set, was stamped on the middle of the die cut base using Crumb Cake ink. The dome and base were both adhered to the card front using Stampin' Dimensionals.
 

Shop my top product picks for this project:

Product List

Don't forget you can bundle and save! Purchase the Snowy Wonder Bundle and save 10%.