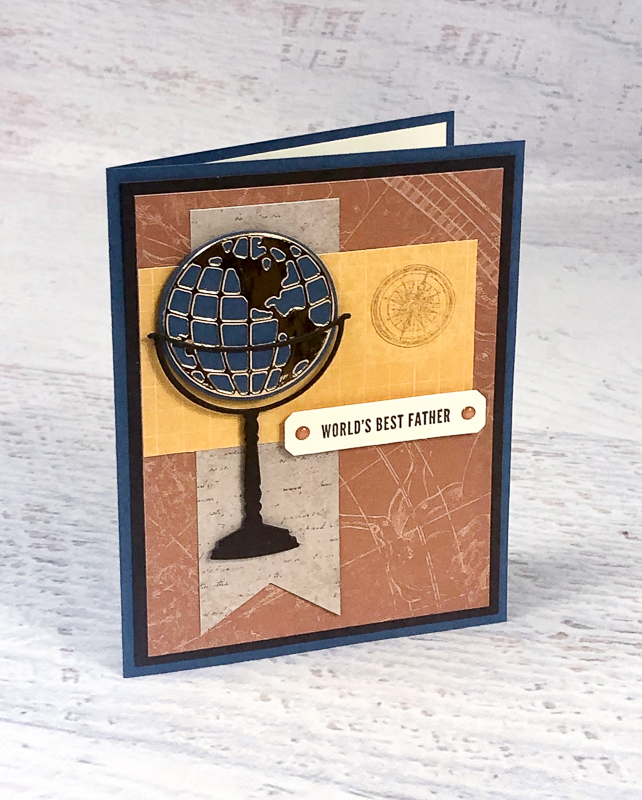
For me, June and the new Annual Catalogue mean it's the start of summer. Summer brings to mind Father's Day, vacations, and sunny days. I think this card combines a bit of all of these, and is a great way to kick off an exploration of the new catalogue!
This card features the World of Good suite. This suite is packed with rich colours, tons of texture, and old world charm. From masculine cards to travel memories this suite is sure to bring you lots of crafting adventures!
|
|
|
|
|
1. Cut, Score & Stamp
|
Cut Misty Moonlight cardstock to 5-1/2" x 8-1/2". Score at 4-1/4" along 8-1/2" side. Cut World of Good paper to 3-1/2" x 2". Cut Very Vanilla cardstock to 4" x 5-1/4". Ink compass image with Crumb Cake ink. Stamp on Very Vanilla layer and then on patterned paper without re-inking.
|
|
|
2. Add Layers
|
Cut Early Espresso cardstock to 4" x 5-1/4". Cut World of Good paper to 3-3/4" x 5". Cut 1-1/2" x 5" strip from World of Good Paper. Punch bottom with Triple Banner Punch. Adhere layers, banner, and stamped patterned paper to card front. Adhere stamped Very Vanilla layer inside card.
|
|
|
3. Die-Cut
|
Use the World Map Dies to die cut the following. Cut scrap Misty Moonlight with the circle. Cut a globe from scrap Brass Foil. Cut the tall globe stand from scrap Early Espresso cardstock.
|
|
|
4. Glue Die-Cuts
|
Use Multipurpose Liquid Glue or Fine-Tip Glue Pen to add a very small amount of glue to the back of the foil globe. Adhere to Misty Moonlight circle. Add very small dots of liquid glue to the horizontal bar at the top of the globe stand and adhere carefully to the globe. Allow glue to dry.
|
|
|
5. Pick a Punch
|
To center a greeting evenly in the Pick a Label Punch you can measure the greeting, plus the space you want on each edge, and add 1/4". Then stamp greeting in the center of the strip and punch each edge. Or get a really well centered greeting without measuring, by following these next steps.
Cut a strip of Very Vanilla cardstock to 1/2" x 3-1/2". Slide one end into the narrowest groove of the square-tipped punch and punch.
|
|
|
6. Stamp Greeting
|
Remove punched label and pick up the little bracket sliver that was punched off the end to use in the next steps. Stamp greeting from Itty Bitty Greetings on the punched strip with Early Espresso ink. Leave almost 1/2" between the punched end and the greeting to leave space for an Enamel Dot.
|
|
|
7. Measure Label
|
Take the little leftover punched sliver, I'm using red so it shows up better, and place it on the right edge of the greeting like a bracket. Move it so the spacing is even on each side of the greeting. Use a pencil to draw a line on your greeting strip at the strait edge of the bracket.
|
|
|
8. Cut Label
|
Use Paper Snips or Stampin' Trimmer to cut on the line.
|
|
|
9. Punch Label Again
|
Place the un-punched end of the label back into the Pick a Punch groove. Slide it all the way into the punch, make sure it's straight in the groove, and punch. You'll have a nicely centered label.
|
|
|
10. Finish Card
|
Adhere the globe and stand to the card with Mini Stampin' Dimensionals. Add In Color Enamel Dots to each end of the punched greeting. The spatula tip of the Take Your Pick Tool works great for these small, self-adhesive dots. Add greeting to card with Mini Stampin' Dimensionals.
|
|
|


")


Great explanation of techniques and steps.
ReplyDeleteBeautiful card and great tutorial!
ReplyDelete